Today, having great product photos is key to making your online store look amazing. Good photos attract people and get them interested in buying. If you’re working in marketing or starting your own business, having top-notch photos is essential to stand out. This guide shows you how to take amazing product pictures. You’ll learn about setting up a simple studio and using the best tools. These tips will make your products look their best online and help increase your sales.
Key Takeaways
- The significance of high-quality product photography in online marketing.
- Essential equipment for capturing stunning product images.
- Tips for setting up a home studio for ecommerce photography.
- The impact of lighting on the quality of product photos.
- Step-by-step process for effective product photography.
Introduction to Product Photography
Product photography is vital for online shops. In this introduction, we look at the basics. These make your ecommerce visuals better. Also, we see how good photography for marketing helps.
Good product photography starts with awesome lighting. The right lighting shows off a product’s best parts. This makes it look more appealing. A chosen background keeps the focus on the product. It avoids distractions.
Great ecommerce visuals need these basics. Putting time into your setup increases sales and customer interest. Right tools and perfect settings are key. They make your product shine.
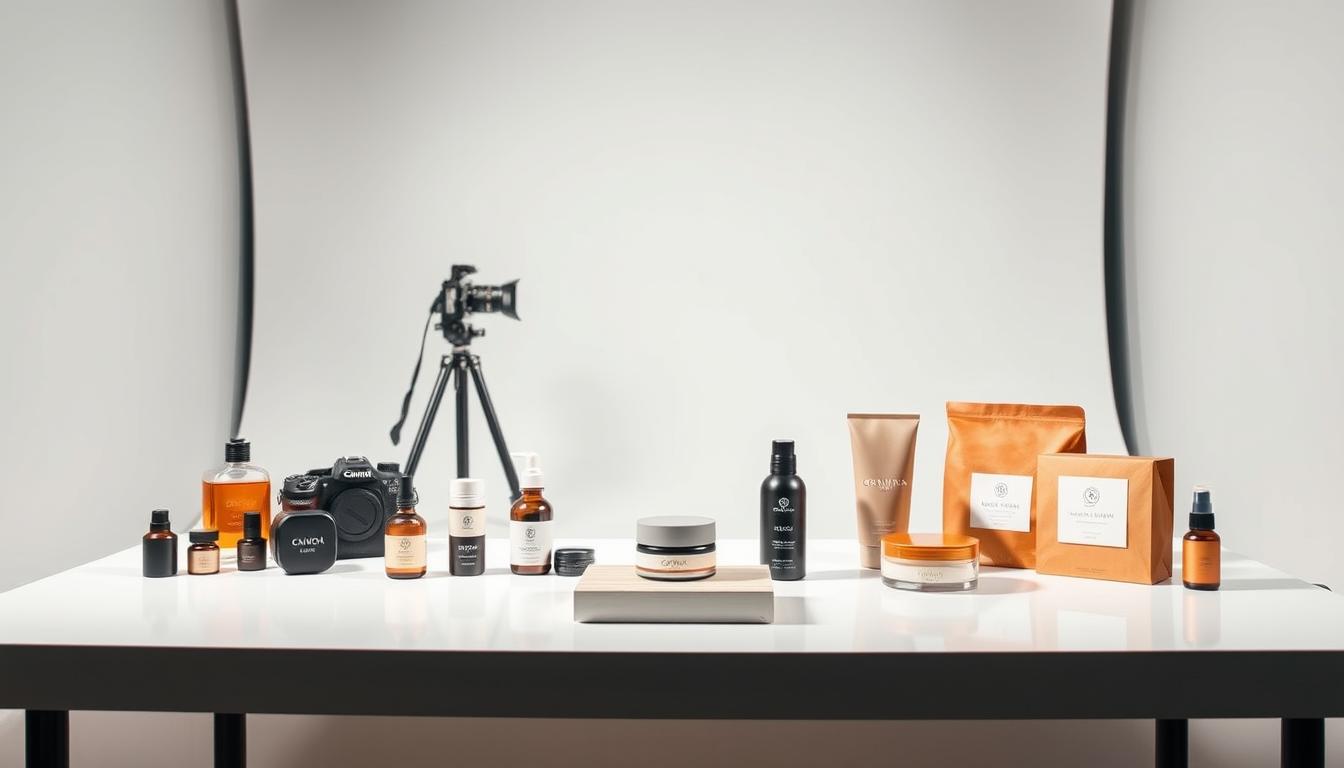
Choosing the Right Equipment for Product Photography
Picking the right tools is key for top-notch product photos. By knowing the pros and cons of each tool, marketers can make their shots look pro without spending too much.
Cameras: DSLR vs. Smartphone
Choosing between DSLR cameras and smartphones depends on what you need. DSLRs give great picture quality and many lens options. They let you control everything manually, great for detailed shots. Smartphones, though, are good for smaller businesses because they’re easy to use and less pricey. Think about what you need for your photos and how much you want to spend to choose right.
Importance of a Tripod
A good tripod keeps your shots steady and clear. It stops the camera from shaking, which is really important in dim light. Spending money on a good tripod will make your photos with smartphones and DSLRs look more pro.
Selecting the Appropriate Lenses
Choosing the right lenses is super important for great product photos. Different lenses work best for different sizes and details of products. For tiny details, a macro lens is best. A wide-angle lens is good for bigger items. Knowing your product and the details you need to capture will help you pick the right lenses and gear.
Setting Up Your Home Studio
Creating a great home studio can make your product photos stand out. Pick the best backgrounds and arrange your table well. Also, make sure everything is stable. This way, you can get awesome results without spending too much.
Essential Backgrounds: White and Sweep
Choosing the right backgrounds is very important. You have two main choices:
- White Background: Perfect for a clean look that makes the product the star.
- Sweep Background: It makes a smooth look from the table to the wall. This stops any lines and shadows that could distract.
Optimal Table Setup
Picking a good table is key. Make sure it’s strong enough to hold your stuff. Tables that you can adjust in height are great for changing things up as needed.
Using Tape and Support Structures
It’s important to keep your backgrounds and products in place. Use tape and supports to do this. This helps keep your pictures clear and consistent. You can use clamps and adhesives to make sure everything stays put during your photo shoot.
| Element | Tips |
|---|---|
| Backgrounds | Choose between white and sweep to suit different product demands. |
| Table Setup | Opt for a sturdy, height-adjustable table for flexibility. |
| Support Structures | Use tape, clamps, and mounts to maintain stability. |
The Impact of Lighting on Product Photography
Lighting is key in product photography. Knowing how to use natural and artificial light can make your photos much better.
Natural Light vs. Artificial Light
Natural light makes images soft and beautiful without extra gear. It shows true colors and textures well. But, natural light can change and be hard to control. On the other hand, studio lighting is steady and lets photographers work any time. Tools like softboxes make the light even and stop harsh shadows.
Using Softboxes and Reflectors
Softboxes make the light softer and more even in studio lighting. This means less harsh shadows. Reflectors send light back to the product. They light up shadows and show off details. Using both softboxes and reflectors makes sure the product is well-lit from every side.
Managing Shadows and Glare
Handling shadows and glare right is key in product photography lighting. Shadows can make images look deeper. But they shouldn’t hide the product. Softboxes and reflectors soften light and shadows. Changing the light’s angle and using diffusers helps cut down glare. This makes your product stand out.
Product Photography Guide: Step-by-Step Process
Starting your product photography journey can seem hard. But, this step-by-step guide will make it easier. It’s perfect for marketers or small business owners. You’ll learn how to get great photos.
First, get your photography gear ready. You can use a DSLR camera or a high-resolution smartphone. Getting the right equipment is key to taking amazing photos.
Then, fix your camera or smartphone settings. For DSLRs, adjust your ISO, aperture, and shutter speed. For smartphones, use pro or manual mode. This helps you control light and depth, making your photos look professional.
Get your product and background ready next. A clean, simple background works great. Place your product well. You can use a few props to tell a story but keep it simple.
Lighting is very important. You can use natural light for a soft look. Or use artificial light for consistency. Adding softboxes or diffusers helps get rid of harsh shadows. This makes your product look good.
Now, start taking photos. Shoot from different sides to show every detail. Check your photos as you go. You might need to change the light, focus, or how things are arranged.
Last, look over your photos on a computer. Find anything that could look better with some edits. You might adjust brightness, contrast, or sharpness. This step makes sure your photos catch people’s eyes.
Shooting Techniques for Different Products
Different products need their own way of being photographed. For shiny things like jewels or tech, it’s key to control light to avoid glare. Using things like diffusers and softboxes makes the light soft. This results in a smooth and even look.
For items with lots of details, like fabrics or small tech, a macro lens works well. It helps capture every tiny detail clearly. Close-up photos also highlight the product’s texture and quality, attracting customers.
Big items, like furniture or home decorations, need a unique approach. A wide-angle lens captures everything in one shot. It gives a full picture. Shooting from different angles shows off the item better. Putting the product in a bright, big space can show its size and special features more.
Small things, like beauty products or accessories, look best with a simple background. A white or plain background keeps the focus on the product. Plus, using a tripod keeps the photo sharp and clear. This makes the image look very professional.
In short, knowing how to shoot different products makes a big difference. By adjusting your technique for each item, you can take great photos. These photos clearly show what’s special about each product.
DIY vs. Professional Photography: When to Outsource
Choosing between DIY product photography or hiring a photographer depends on several things. You must consider cost and how complex your products are. Each choice has its own benefits and challenges.
Cost Considerations
Cost is a big factor in this decision. DIY photography may seem cheaper at first since you’re not paying a pro. But, buying good equipment and learning to use it costs money too. On the other side, professional product photography means you get great, consistent photos. This can lead to more sales and a stronger brand.
Complexity of Products
If your products are simple, doing the photography yourself might work well. But for tricky or shiny things, like jewelry or electronics, you might need a pro. Pros have the right equipment and skills. Hiring one can save time and cut mistakes. This ensures your images are up to the mark for platforms like Amazon.
The choice between DIY photography and professional help comes down to budget, time, and your product’s needs. Weighing these will guide you to the best decision for your business.
Post-Processing: Enhancing Your Photos
Post-processing is very important in product photography. It lets photographers improve their photos with photo editing and post-processing techniques. These methods make the final images look professional and eye-catching.

First, you adjust exposure and color. These simple changes can really brighten your photos and show your product’s true colors.
Then, there are post-processing techniques like retouching and removing backgrounds. They make your photos look better by fixing blemishes and adjusting sharpness. These steps help your images pop and catch people’s eyes.
Here’s a list of basic and advanced photo editing and post-processing techniques:
| Technique | Objective | Application |
|---|---|---|
| Exposure Adjustment | Improve Brightness | Basic Edits |
| Color Correction | Enhance Color Accuracy | Basic Edits |
| Retouching | Remove Imperfections | Advanced Edits |
| Background Removal | Isolate Product | Advanced Edits |
Using these post-processing techniques makes your product pictures much more appealing. Spending time on photo editing ensures every detail of your product looks its best.
Consistency and Style in Product Photography
It’s key to keep your product photos similar to help your brand and make shopping smooth. Things like true colors and matching photos are very important. They shape the way buyers see your items.
Maintaining Color Accuracy
Showing true colors in photos is very important. It makes sure the products look real. Use style guides to know the right colors. Good lighting and camera setups also keep colors right. This builds trust with buyers and reduces returns.
Using Presets for Uniformity
Editing presets are great for keeping your photos looking the same. When you use the same presets on all photos, they match. This makes your photos consistent and fits your brand’s look.
Here’s a table that shows how presets affect photo consistency and colors:
| Aspect | With Editing Presets | Without Editing Presets |
|---|---|---|
| Consistency | High | Low |
| Color Accuracy | Maintained | Variable |
| Time Efficiency | Improved | Reduced |
| Brand Cohesion | Strong | Weak |
Advanced Techniques: Lifestyle and Contextual Shots
Exploring advanced photo methods is key. Adding lifestyle and contextual images can make your product pictures better. These methods let us tell lively stories and show products in daily use, connecting deeply with shoppers.
Incorporating Props
Using the right props can make your images feel real. Pick props that match the life story you want to tell. Props that go well with your product highlight its use and how it works.
“Props are essential in contextual photography as they help create a narrative around the product, making it an integral part of the visual story.” – Annie Leibovitz
Shooting with Models
Models bring your brand to life and show your products in use. It’s important to choose models who reflect your audience. This makes your lifestyle photos more powerful. Plus, models help people see themselves using your products, increasing interest.
With advanced photo techniques, props, and models, your images will shine. They’ll offer inviting lifestyle shots that grab attention and lead to sales.
Optimizing Images for SEO and Web Performance
In today’s world, SEO for images is very important. It helps your site run faster and appear higher in search results. We will see how to keep your image quality high but also make your site fast.
Start by resizing images before you add them to your site. You can use Adobe Photoshop or TinyPNG online to make images smaller. Smaller images help your website load faster, which search engines like.
Then, try image compression to speed things up even more. Tools like ImageOptim or ShortPixel for WordPress work great for this. They keep your images looking good while helping them load quickly.
Picking the right file type is also key. Use JPEG for complex pictures and PNG for simple ones, like logos. WebP is a newer type that offers even better quality and size. This helps with both SEO for images and website speed.
Don’t forget about alt text for SEO for images. Use clear, keyword-rich descriptions. This makes your site better for people who can’t see images and helps search engines understand your images.
Lastly, use lazy loading so images load only when needed. This makes pages load faster at first, making your site more enjoyable to use. Many platforms have tools to help you do this easily.
By using these tricks and tools, your images will help your site work better and rank higher in searches. Your website will be quicker and more pleasant for everyone to use.
Conclusion
Quality product photos are key to selling online. With the right gear, good lighting, and editing skills, you can make your products look amazing. This guide has shared many tips to help you.
We talked about how to set up a place at home to take these photos and different ways to take pictures. Great photos make people trust and like your brand more. You can also make your photos easy to find online with SEO tricks.
These tips are just the start. They help you keep getting better. The world of photography keeps changing. So, it’s important to keep learning and trying new things. This will help you take the best photos for your online store.